
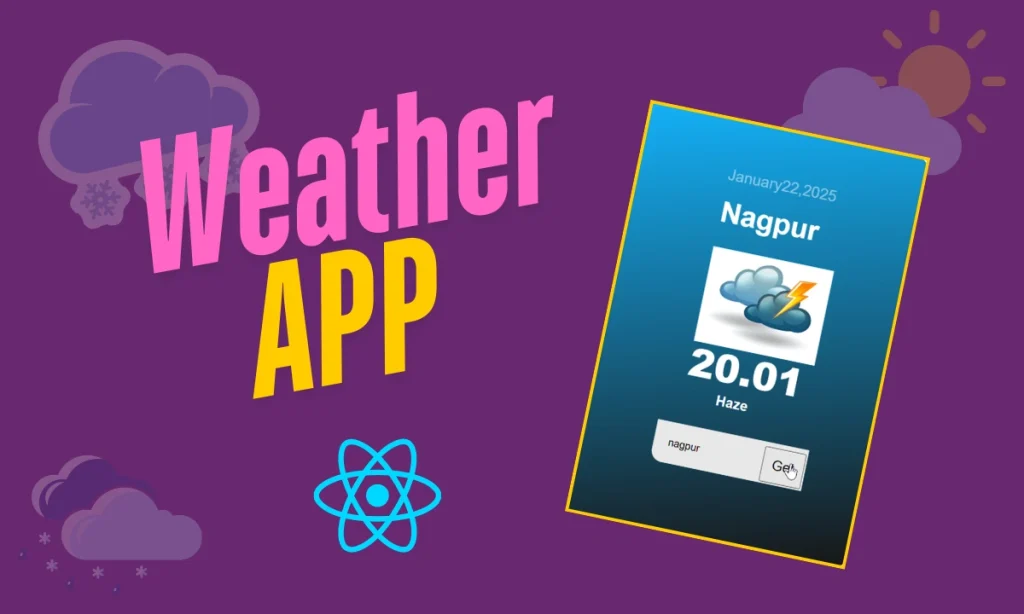
Creating a Weather App Using React- Building a weather app using React is a fantastic project to enhance your frontend development skills. This guide will walk you through the step-by-step process, including how to fetch weather data from an API, style your app, and make it fully interactive. By the end, you’ll have a dynamic and visually appealing weather app ready to use!
Introduction to the Weather App
A weather app allows users to check real-time weather conditions for any city. In this project, we’re using React—a powerful JavaScript library for building user interfaces—to fetch and display weather data dynamically. The app is responsive, interactive, and features a modern, sleek design.
Key Features of the Weather App
- Real-Time Weather Updates: Fetch data from OpenWeatherMap API.
- Dynamic City Search: Input any city to get the latest weather.
- Clean and Modern UI: Styled with CSS and responsive design.
- Interactive Features: User-friendly input and button interactions.
- Weather Icon Display: Adds a visual element to enhance usability.
Understanding the Code Structure
The app is built using the following key components and technologies:
- React Hooks:
useStateanduseEffectmanage state and lifecycle events. - API Integration: Fetch data from OpenWeatherMap API using the fetch method.
- CSS Styling: Create a visually appealing layout with gradient backgrounds and modern design elements.
Step-by-Step Guide to Building the App
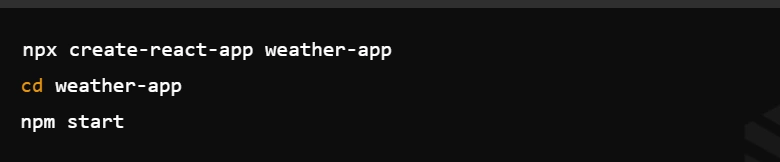
Setting Up the React Project
Start by setting up your React environment. Use the following commands:
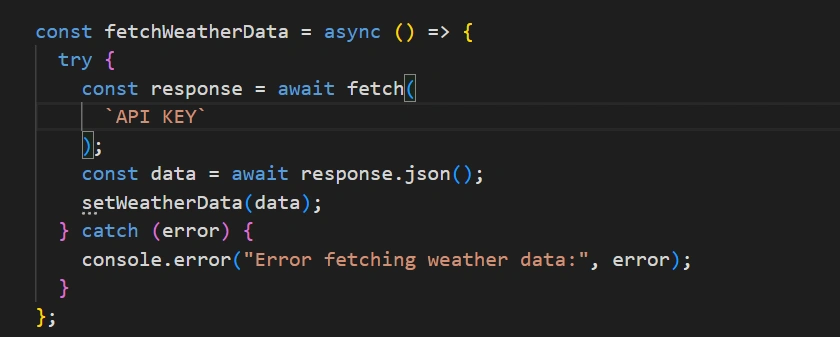
Fetching Weather Data Using an API
- Sign up on OpenWeatherMap to get your free API key.
- Use the
fetchfunction in React to get real-time weather data.
Here’s the code snippet for fetching data:
const fetchWeatherData = async () => {
  try {
    const response = await fetch(
      `https://api.openweathermap.org/data/2.5/weather?q=${city}&appid=${API_KEY}&units=metric`
    );
    const data = await response.json();
    setWeatherData(data);
  } catch (error) {
    console.error("Error fetching weather data:", error);
  }
};
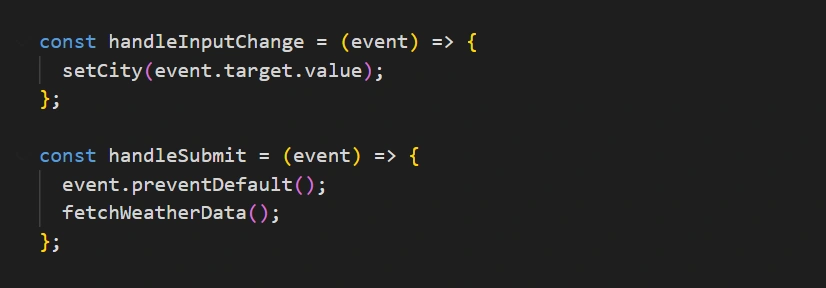
Adding User Interactions
Use an input field and a button to allow users to search for a city. Handle user input with onChange and onSubmit events:
const handleInputChange = (event) => {
  setCity(event.target.value);
};

const handleSubmit = (event) => {
  event.preventDefault();
  fetchWeatherData();
};
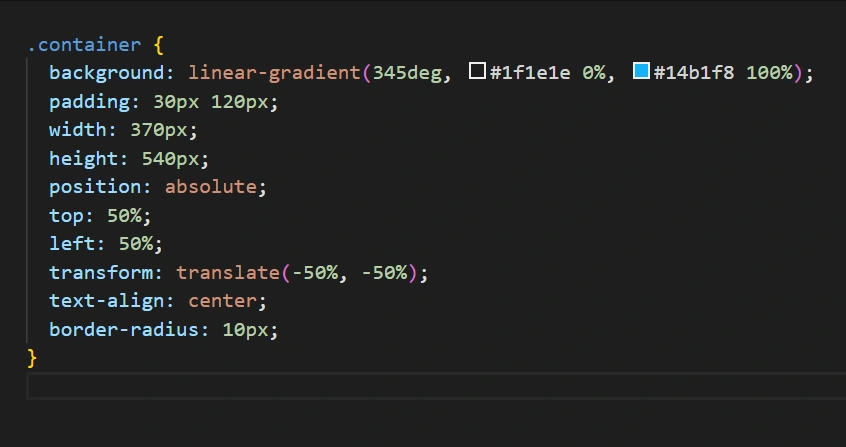
Styling the App with CSS
Enhance the look and feel of your app with CSS. Use gradients, responsive layouts, and interactive elements to create an engaging UI. Below is an example of the container styling:
.container {
  background: linear-gradient(345deg, #1f1e1e 0%, #14b1f8 100%);
  padding: 30px 120px;
  width: 370px;
  height: 540px;
  position: absolute;
  top: 50%;
  left: 50%;
  transform: translate(-50%, -50%);
  text-align: center;
  border-radius: 10px;
}
Example Code Explanation
The following is the complete React component:
import { useEffect, useState } from "react";

function App() {
  const [city, setCity] = useState("delhi");
  const [weatherData, setWeatherData] = useState(null);

  const currentDate = new Date();
  const months = [
    "January", "February", "March", "April", "May", "June",
    "July", "August", "September", "October", "November", "December",
  ];
  const formatDate = `${months[currentDate.getMonth()]} ${currentDate.getDate()}, ${currentDate.getFullYear()}`;

  const API_KEY = "your_api_key";

  const fetchWeatherData = async () => {
    try {
      const response = await fetch(
        `API KEY`
      );
      const data = await response.json();
      setWeatherData(data);
    } catch (error) {
      console.error(error);
    }
  };

  useEffect(() => {
    fetchWeatherData();
  }, []);

  const handleInputChange = (event) => setCity(event.target.value);

  const handleSubmit = (event) => {
    event.preventDefault();
    fetchWeatherData();
  };

  return (
    <div className="App">
      <div className="container">
        {weatherData && (
          <>
            <h1 className="container_date">{formatDate}</h1>
            <div className="weather_data">
              <h2 className="container_city">{weatherData.name}</h2>
              <img
                className="container_img"
                src="img.png"
                alt="weather-icon"
              />
              <h2 className="container_degree">{weatherData.main.temp}°C</h2>
              <h2 className="Country_per">{weatherData.weather[0].main}</h2>
              <form className="form" onSubmit={handleSubmit}>
                <input
                  type="text"
                  className="input"
                  placeholder="Enter city name"
                  onChange={handleInputChange}
                />
                <button type="submit">Get</button>
              </form>
            </div>
          </>
        )}
      </div>
    </div>
  );
}

export default App;
Table: Key Components in the App
| Component | Description | Technology Used |
|---|---|---|
| useState | Manages city and weather data states | React |
| useEffect | Triggers API call on component load | React |
| Fetch API | Retrieves weather data | JavaScript |
| CSS Styling | Designs the user interface | CSS |
FAQs
How do I get an API key for OpenWeatherMap?
Sign up at OpenWeatherMap and generate a free API key under your account dashboard.
Why is React used for this project?
React simplifies building dynamic, responsive user interfaces with reusable components.
How can I style my weather app?
Use CSS for styling. Experiment with gradients, padding, and responsive layouts for an appealing design.
Can I deploy this app?
Yes! You can deploy it on platforms like Netlify or Vercel for free.
What are the limitations of this app?
The free OpenWeatherMap API may have rate limits, and additional features like hourly forecasts require a premium API.